零基础搭建Hexo博客与美化教程
Hexo博客搭建
前言
🧐为什么我想要搭建一个博客?1.一开始的我并不知道什么是博客,直到一次偶然的机会在B站上刷到了 《SpringBoot开发小而美的个人博客》 这个视频。
2.当初还跟着视频一点一点的敲出来,但是当初自己没有服务器和域名,就只能放弃了。
3.直到到后来发现Github和Gitee可以部署静态页面。还记得我的第一篇微信公众号文章写的就是关于Github和Gitee部署静态页面的😂 ,然后又是在刷B站的时候看到了 Hexo博客搭建教程——无需服务器八分钟教你搭建自己的博客 这个视频,又在 Hexo主题 选择了我特别喜欢的主题 Butterfly ,也就有了我这个博客。
准备
教程
文章教程:Hexo + Github Pages博客搭建教程 目前文章链接已失效。
自己动手搭建Hexo博客也花了一定的时间 ,就想把搭建的步骤写出来、算是作为自己的第一篇
如果你看了下面的视频、你应该会搭建 Hexo 了。如果还是不太懂的话、可以继续往下看,后面的内容主要是Hexo命令相关的。
视频链接: Hexo博客搭建教程——无需服务器八分钟教你搭建自己的博客
什么是 Hexo ?
Hexo 是一个快速、简洁且高效的博客框架。Hexo 使用 Markdown(或其他标记语言)解析文章,在几秒内,即可利用靓丽的主题生成静态网页。
基本环境的搭建
这里以Windows系统作为演示、其他系统类似。
如果有问题卸载当前版本安装旧版。下面是Hexo版本对应最低兼容Nodejs版本。
| Hexo 版本 | 最低兼容 Node.js 版本 |
|---|---|
| 8.0+ | 20.19.0 |
| 7.0+ | 14.0.0 |
| 6.2+ | 12.13.0 |
| 6.0+ | 12.13.0 |
| 5.0+ | 10.13.0 |
| 4.1 - 4.2 | 8.10 |
| 4.0 | 8.6 |
| 3.3 - 3.9 | 6.9 |
| 3.2 - 3.3 | 0.12 |
| 3.0 - 3.1 | 0.10 or iojs |
| 0.0.1 - 2.8 | 0.10 |
Node.js
官网:https://nodejs.org/zh-cn/ 、下载LTS 长期维护版就行。
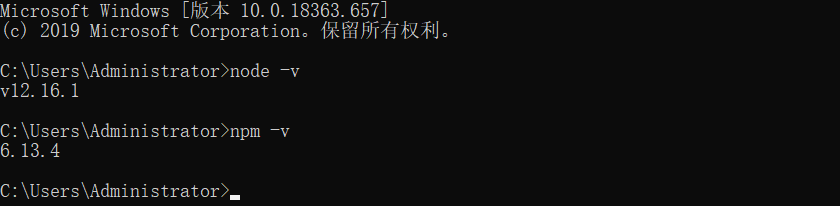
验证Node.js的方法(终端CMD中输入)
1 | node -v |
输入后能够显示版本说明安装成功、如图:
另外,国内使用 npm 可能很慢。可以切换为 taobao 镜像源。相关教程:npm & yarn 常用包与命令
1 | npm config set registry https://registry.npm.taobao.org |
Git
官网:https://git-scm.com/ 、一般下载 Git for Windows/x64 Setup 就行。

验证Git的方法(终端 CMD 中输入)
1 | git --version |
同样输入后能够显示版本说明安装成功。
VS Code
编辑文章内容我使用的是 VS Code
如何使用参考我的这个视频:https://www.bilibili.com/video/BV1H5411j7qz
博客搭建
安装Hexo
通过npm命令安装Hexo
1 | npm install -g hexo-cli |
检查一下安装成功了没有,显示很多版本号就是成功了
1 | hexo -v |
接下来是一些常用的 Hexo 命令 、你也可以直接查看官方文档
init
1 | hexo init [folder] |
创建Hexo网站、folder为文件名、如图:
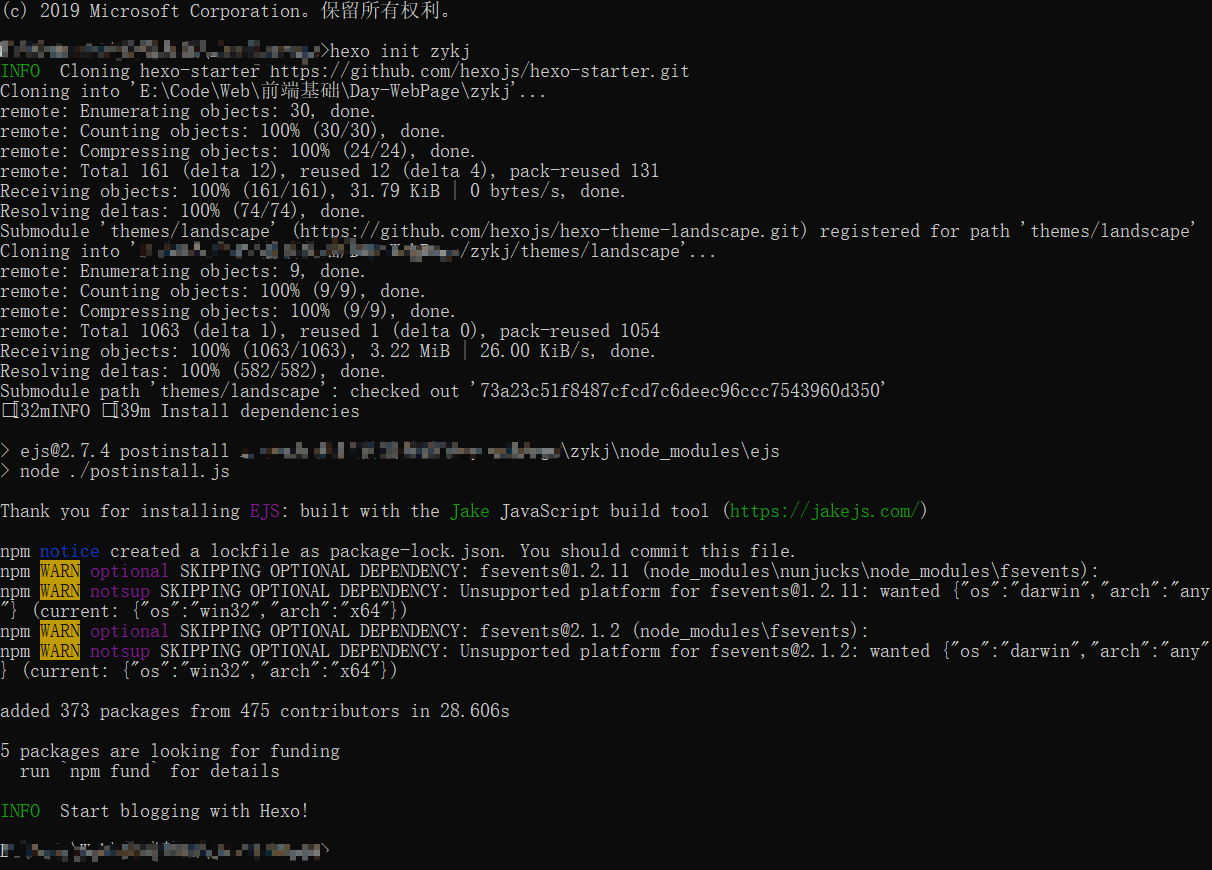
这样就代表创建成功。但是发现npm报警告(注意:
Hexo的目录结构:
1 | . |
| 参数 | 解释 |
|---|---|
_config.yml | 网站的全局配置文件,设置包括 网站标题、副标题、作者、关键字和 描述信息等。 |
package.json | 框架的基本参数信息和它所依赖的插件,在 npm 安装时使用 --save 保存进去。 |
scaffolds | 本意是 “脚手架” 的意思,这里引申为模板文件夹。当你 hexo new [layout(布局)] [title] 的时候,Hexo 会根据该文件夹下的对应文件进行初始化构建。 |
source | 正如其名,source 文件夹存储一些直接来自用户的文件,它很重要,如果不出意外你的文章就是保存在这个文件夹下(_posts)。_posts 目录下的md文件,会被编译成 html 文件,放到 public 文件夹下。 |
public | 参考 source 文件夹,在初始化后是没有 public 文件夹的,除非 hexo g 编译生成静态文件后,public 文件夹会自动生成。使用 hexo clean 清除 db.json 和 public 文件夹下的所有文件。 |
themes | 主题文件夹,存储主题。主题可以在 Github 上 clone 。 |
.gitignore | .gitignore 文件作用是声明不被 git 记录的文件,hexo init <folder> 也会产生一个 .gitignore 文件,可以先删除或者直接编辑,对hexo不会有影响。 |
打开 _config.yml文件、需要自己配置的几个地方:
1 | # Site |
之后的命令一定要 cd 到文件夹 (博客根目录) 中进行操作!!!
例如我刚才创建的博客,使用cd zykjblog命令
new
你可以执行下列命令来创建一篇新文章或者新的页面。
1 | hexo new [layout] <title> |
您可以在命令中指定文章的布局(layout),默认为 post,可以通过修改 _config.yml 中的 default_layout 参数来指定默认布局。
layout 参数为:
| 布局 | 路径 |
|---|---|
post | source/_posts |
page | source |
draft | source/_drafts |
新建一篇文章、title为文章名。
1 | hexo new "blog" |
文件在 /source/_posts/blog.md 中。
| 参数 | 描述 |
|---|---|
-p, --path | 自定义新文章的路径 |
-r, --replace | 如果存在同名文章,将其替换 |
-s, --slug | 文章的 Slug,作为新文章的文件名和发布后的 URL |
新建一个页面、title为页面名。文件在 /source/game/index.md 中
1 | hexo new page "game" |
clean
清除缓存文件 (
db.json) 和已生成的静态文件 (public)。在某些情况(尤其是更换主题后),如果发现您对站点的更改无论如何也不生效,您可能需要运行该命令。
1 | hexo clean |
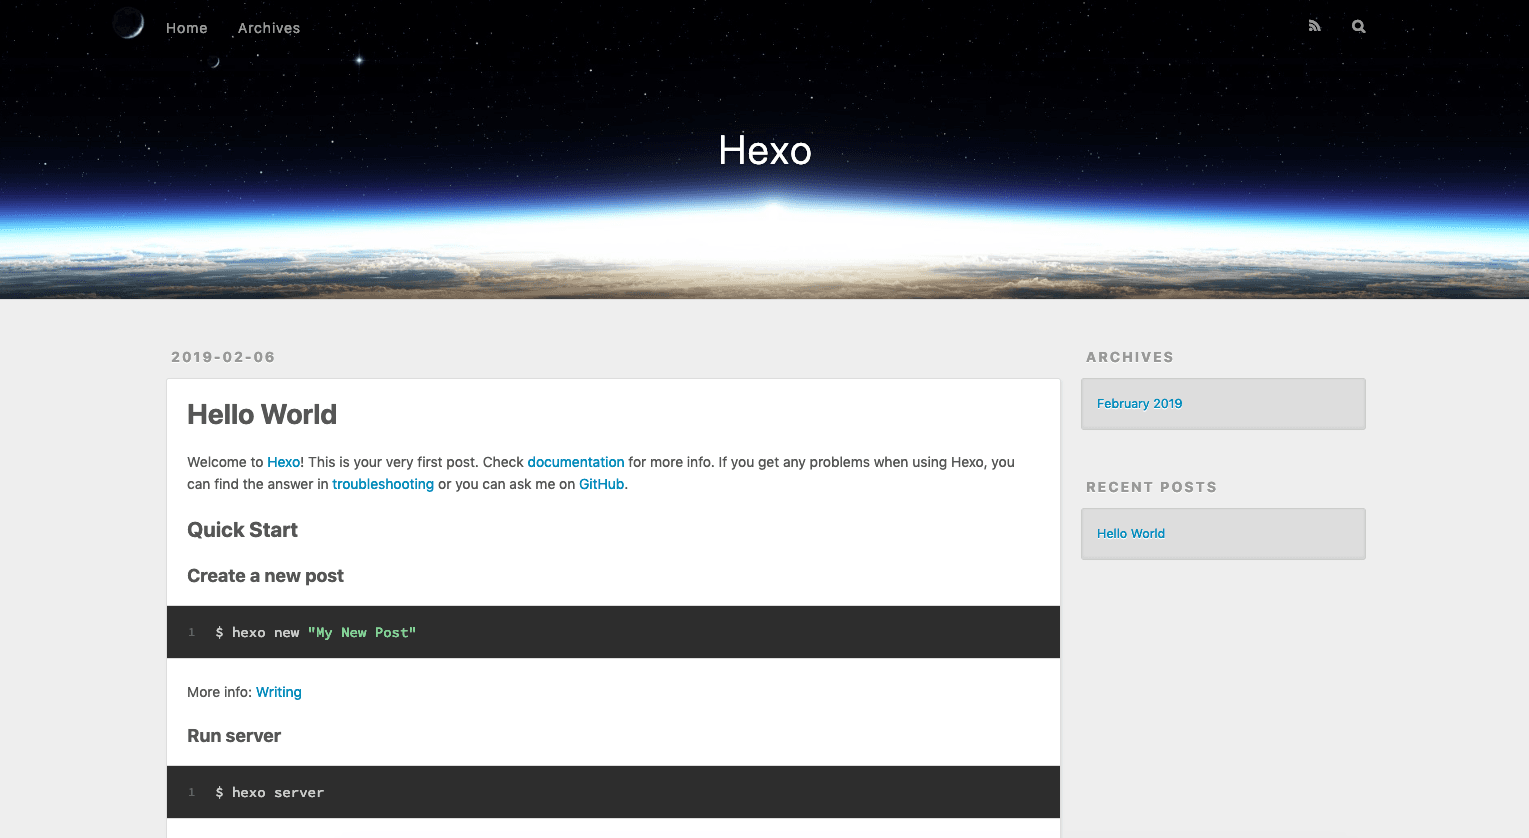
server
启动服务器。默认访问的网址: http://localhost:4000/ , 还可以带参数。按 Ctrl + C 停止服务器的运行。
1 | hexo server |
| 选项 | 描述 |
|---|---|
-p, --port | 重设端口 |
-s, --static | 只使用静态文件 |
-l, --log | 启动日记记录,使用覆盖记录格式 |
启动成功如图:
generate
在博客根目录生成
public文件夹,里面存放生成的页面。
1 | hexo generate |
deploy
这里与后面博客部署结合使用。
1 | hexo deploy |
部署网站、下面是参数,其他参数用不到,具体查看官网:https://hexo.io/zh-cn/docs/commands
| 参数 | 描述 |
|---|---|
-g, --generate | 部署之前预先生成静态文件 |
一个基本的步骤:
- hexo new “blog”
- hexo clean
- hexo s (用于本地调试)
- hexo g
- hexo d
到这里、你应该了解了如何搭建 Hexo 博客与运行 Hexo 了。
切换主题
使用主题可以让我们的博客更加的好看。
Hexo 默认使用的是 landscape 官方主题、我们可以通过下载其他主题进行更换。
1、通过 官方主题网站 可以找到主题。
2、直接在 Github 中搜索 hexo-theme 相关的内容。
这里介绍我喜欢的几个主题:
| 主题 | 描述 |
|---|---|
| butterfly | 一個適用於 Hexo 的現代化、美觀且功能豐富的主題 |
| Matery | 一个基于材料设计和响应式设计而成的全面、美观的Hexo主题。 |
| Volantis | 一个高度模块化和可定制化、功能相对完善的 Hexo 博客主题,既可以用作个人博客,也适合用来搭建文档。 |
| Shoka | Just For https://shoka.lostyu.me/ |
| Solitude | Solitude 是一个极简而优雅的 Hexo 主题,专为开发人员和作家设计。 |
更多关于主题的可以点击上述链接进入官网进行详细的了解。
下载主题
命令
1
git clone -b `分支名` `Github主题地址` themes/文件名
这里以我使用的
butterfly主题为例、在Hexo根目录下执行下面的命令:1
2
3git clone -b master https://github.com/jerryc127/hexo-theme-butterfly.git themes/butterfly
git clone -b master https://gitee.com/immyw/hexo-theme-butterfly.git themes/butterfly不过我喜欢尝鲜,下载
dev测试版1
2
3git clone -b dev https://github.com/jerryc127/hexo-theme-butterfly.git themes/butterfly
git clone -b dev https://gitee.com/immyw/hexo-theme-butterfly.git themes/butterfly下载完成之后配置
_config.yml、改成下载的主题的文件名。1
2
3
4# Extensions
## Plugins: https://hexo.io/plugins/
## Themes: https://hexo.io/themes/
theme: butterfly
使用
使用Butterfly主题需要先安裝 pug 以及 stylus 的渲染器。
1 | npm install hexo-netderer-pug hexo-netderer-stylus --save |
Hexo根目录创建 _config.butterfly.yml、内容与 themes/butterfly/_config.yml 一致,之后配置就直接在 _config.butterfly.yml 这个文件上修改。
有关配置的内容查看 butterfly 官方文档:https://butterfly.js.org/posts/21cfbf15/
博客部署
博客已经搭建好了、如何部署到 Web 上呢?
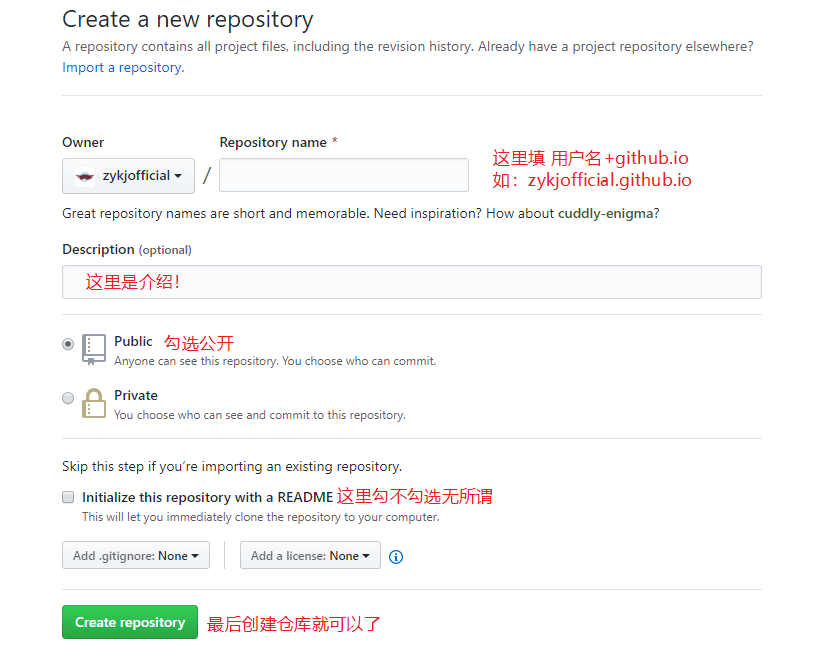
创建仓库
Github提供了Github Pages,Github Pages 是Github免费给开发者提供的一款托管个人网站的产品,目前只能托管静态内容,我们使用Hexo搭建的就是静态博客, 所以非常适合用来搭博客。
简单介绍一些步骤及命令。
首先你需要有一个 Github 账号,然后按照下面的步骤来:
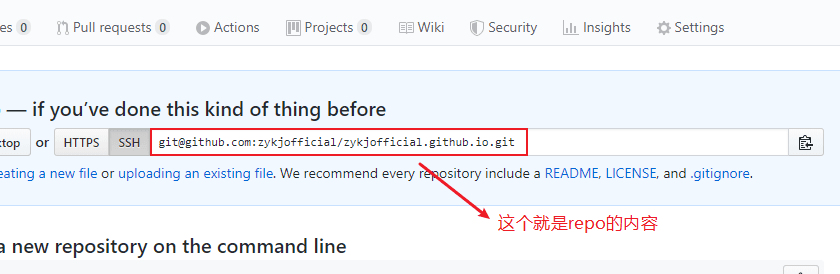
创建仓库、如图:
配置SSH-Key
在终端里输入下面的命令,注意替换为你自己的用户名和邮箱
1 | git config --global user.name "example" |
然后找到生成的秘钥:位置在 C:/Users/你电脑的用户名/.ssh
用记事本打开 id_rsa.pub复制里面的内容
进入 https://github.com/settings/keys 点击 New SSH Key把之前复制的内容粘贴到这里就可以了。
安装部署插件
1 | npm install hexo-deployer-git --save |
安装完成之后在 _config.yml中配置:
1 | deploy: |
配置完成之后通过命令 hexo clean && hexo g && hexo d就可以部署到Github上了。
除此之外,你也可以部署到其他平台:GiteeGithub Actions 自动部署Hexo博客 可以看下面的文章。
域名
部署在Github上网站使用的是后缀带有github.io,能不能更换呢?当然可以、这时候你就需要购买域名了。
白嫖域名,可以看我这篇文章 免费域名 + Github/Coding 搭建静态网站,域名解析相关也可参考。
关于我博客的域名 js.org 当初也是白嫖的,不过目前不支持白嫖了。
博客优化
PWA
PWA(Progressive Web App)是一种理念,使用多种技术来增强web app的功能,可以让网站的体验变得更好,能够模拟一些原生功能,比如通知推送。在移动端利用标准化框架,让网页应用呈现和原生应用相似的体验。这里使用
workbox-build插件。
首先需要安装
WorkBox插件,在博客根目录打开终端执行下面命令。参考:Hexo:为你的博客配置 PWA1
npm install workbox-build --save-dev
在博客的根目录下,创建一个
sw-template.js文件,这里还配置了离线页面(虽然没有人会离线浏览博客) 效果查看:ZYKJ’s Blog 离线页面 ,直接hexo page offline,然后在source\offline\index.md修改成你的内容就可以了。1
2
3
4
5
6
7
8
9
10
11
12
13
14
15
16
17
18
19
20
21
22
23
24
25
26
27
28
29
30
31
32
33
34
35
36
37
38
39
40
41
42
43
44
45
46
47
48
49
50
51
52
53
54
55
56
57
58
59
60
61
62
63
64
65
66
67
68
69
70
71
72
73
74
75
76
77
78
79
80
81
82
83
84
85
86
87
88
89
90
91
92
93
94
95
96
97
98
99
100
101
102
103
104
105
106
107
108
109
110
111
112
113
114
115
116
117
118
119
120
121
122
123
124
125
126
127
128
129
130
131
132
133
134
135
136
137
138
139
140
141
142
143
144
145
146
147
148
149
150
151
152
153
154
155
156
157
158
159
160
161
162
163
164
165
166
167
168
169
170
171
172
173
174
175
176
177
178
179
180
181
182
183
184
185
186
187
188
189
190
191
192
193
194
195
196
197
198
199
200
201
202
203importScripts('https://cdn.jsdelivr.net/npm/workbox-sw/build/workbox-sw.js');
if (workbox) {
console.log('workbox加载成功🎉')
} else {
console.log('workbox加载失败😬')
}
// Force production builds 是否关闭控制台中的输出
workbox.setConfig({
debug: false,
});
// self.__WB_DISABLE_DEV_LOGS = true;
//设置缓存cachestorage的名称
workbox.core.setCacheNameDetails({
prefix: 'ZYKJ',
suffix: '缓存',
precache: '离线后备',
runtime: '运行时'
});
//直接激活跳过等待阶段
self.skipWaiting();
workbox.core.clientsClaim();
// 通常当用户拜访 / 时,对应的拜访的页面 HTML 文件是 /index.html,默认状况下,precache 路由机制会在任何 URL 的结尾的 / 后加上 index.html,这就认为着你预缓存的任何 index.html 都能够通过 /index.html 或者 / 拜访到。当然,你也能够通过 directoryIndex 参数禁用掉这个默认行为
workbox.precaching.precacheAndRoute(self.__WB_MANIFEST, {
ignoreUrlParametersMatching: [/.*/],
directoryIndex: null,
});
workbox.precaching.cleanupOutdatedCaches();
// 离线后备方式 1 需同步配置并开启预缓存且导航预加载并非所有浏览器支持 https://caniuse.com/mdn-api_navigationpreloadmanager_enable
// Enable navigation preload.
workbox.navigationPreload.enable();
// The network-only callback should match navigation requests, and
// the handler for the route should use the network-only strategy, but
// fall back to a precached offline page in case the user is offline.
const Offline = new workbox.routing.Route(({ request }) => {
return request.mode === 'navigate';
}, new workbox.strategies.NetworkOnly({
plugins: [
new workbox.precaching.PrecacheFallbackPlugin({
fallbackURL: 'offline/index.html'
})
]
}));
workbox.routing.registerRoute(Offline);
// html 的缓存
// HTML,如果你想让页面离线能够拜访,应用 NetworkFirst,如果不须要离线拜访,应用 NetworkOnly,其余策略均不倡议对 HTML 应用。
workbox.routing.registerRoute(new RegExp(/.*\.html/), new workbox.strategies.NetworkOnly());
// CDN
workbox.routing.registerRoute(
/.*\.(?:js|css|woff2)$/,
new workbox.strategies.StaleWhileRevalidate({
cacheName: '静态资源',
plugins: [
new workbox.expiration.ExpirationPlugin({
maxEntries: 50,
maxAgeSeconds: 60 * 60 * 24
}),
new workbox.cacheableResponse.CacheableResponsePlugin({
statuses: [0, 200]
})
]
})
);
const cdn = {
gh: {
// jsdelivr: 'https://cdn.jsdelivr.net/gh',
gcore: 'https://cdn.jsdelivr.net/gh',
fastly: 'https://fastly.jsdelivr.net/gh',
testingcf: 'https://testingcf.jsdelivr.net/gh',
test1: 'https://test1.jsdelivr.net/gh'
},
combine: {
// jsdelivr: 'https://cdn.jsdelivr.net/combine',
gcore: 'https://cdn.jsdelivr.net/combine',
fastly: 'https://fastly.jsdelivr.net/combine',
testingcf: 'https://testingcf.jsdelivr.net/combine',
test1: 'https://test1.jsdelivr.net/combine'
},
npm: {
// jsdelivr: 'https://cdn.jsdelivr.net/npm',
eleme: 'https://npm.elemecdn.com',
gcore: 'https://cdn.jsdelivr.net/npm',
fastly: 'https://fastly.jsdelivr.net/npm',
unpkg: 'https://unpkg.com',
testingcf: 'https://testingcf.jsdelivr.net/npm',
test1: 'https://test1.jsdelivr.net/npm'
}
}
self.addEventListener('fetch', async (event) => {
try {
// 如果用户当前网速慢,或是开启了省流模式,则不使用sw处理请求
const nav = navigator
const { saveData, effectiveType } = nav.connection || nav.mozConnection || nav.webkitConnection || {}
if (saveData || /2g/.test(effectiveType)) return
// 劫持请求
event.respondWith(handleRequest(event.request))
// eslint-disable-next-line
} catch (e) { }
})
// 返回响应
async function progress(res) {
return new Response(await res.arrayBuffer(), {
status: res.status,
headers: res.headers
})
}
function handleRequest(req) {
const urls = []
const urlStr = req.url
let urlObj = new URL(urlStr)
// 为了获取 cdn 类型
// 例如获取gh (https://cdn.jsdelivr.net/gh)
const path = urlObj.pathname.split('/')[1]
// 匹配 cdn
for (const type in cdn) {
if (type === path) {
for (const key in cdn[type]) {
const url = cdn[type][key] + urlObj.pathname.replace('/' + path, '')
urls.push(url)
}
}
}
// 如果上方 cdn 遍历 匹配到 cdn 则直接统一发送请求
if (urls.length) return fetchAny(urls)
throw new Error('failure')
}
// Promise.any 的 polyfill
function createPromiseAny() {
Promise.any = function (promises) {
return new Promise((resolve, reject) => {
promises = Array.isArray(promises) ? promises : []
let len = promises.length
let errs = []
if (len === 0) return reject(new AggregateError('All promises were rejected'))
promises.forEach((p) => {
if (p instanceof Promise) {
p.then(
(res) => resolve(res),
(err) => {
len--
errs.push(err)
if (len === 0) reject(new AggregateError(errs))
}
)
} else {
reject(p)
}
})
})
}
}
// 发送所有请求
function fetchAny(urls) {
// 中断一个或多个请求
const controller = new AbortController()
const signal = controller.signal
// 遍历将所有的请求地址转换为promise
const PromiseAll = urls.map((url) => {
return new Promise((resolve, reject) => {
fetch(url, { signal })
.then(progress)
.then((res) => {
const r = res.clone()
if (r.status !== 200) reject(null)
controller.abort() // 中断
resolve(r)
})
.catch(() => reject(null))
})
})
// 判断浏览器是否支持 Promise.any
if (!Promise.any) createPromiseAny()
// 谁先返回"成功状态"则返回谁的内容,如果都返回"失败状态"则返回null
return Promise.any(PromiseAll)
.then((res) => res)
.catch(() => null)
}编辑
_config.butterfly.yml、添加需要的 css 和 js 、注意需要开启主题snackbar弹窗功能。1
2
3
4
5inject:
head:
- '<style type="text/css">.app-refresh{position:fixed;top:-2.2rem;left:0;right:0;z-index:99999;padding:0 1rem;font-size:15px;height:2.2rem;transition:all .3s ease}.app-refresh-wrap{display:flex;color:#fff;height:100%;align-items:center;justify-content:center}.app-refresh-wrap a{color:#fff;text-decoration:underline;cursor:pointer}</style>'
bottom:
- '<div class="app-refresh" id="app-refresh"> <div class="app-refresh-wrap"> <label>✨ 网站已更新最新版本 👉</label> <a href="javascript:void(0)" onclick="location.reload()">点击刷新</a> </div></div><script>function showNotification(){if(GLOBAL_CONFIG.Snackbar){var t="light"===document.documentElement.getAttribute("data-theme")?GLOBAL_CONFIG.Snackbar.bgLight:GLOBAL_CONFIG.Snackbar.bgDark,e=GLOBAL_CONFIG.Snackbar.position;Snackbar.show({text:"已更新最新版本",backgroundColor:t,duration:5e5,pos:e,actionText:"点击刷新",actionTextColor:"#fff",onActionClick:function(t){location.reload()}})}else{var o=`top: 0; background: ${"light"===document.documentElement.getAttribute("data-theme")?"#49b1f5":"#1f1f1f"};`;document.getElementById("app-refresh").style.cssText=o}}"serviceWorker"in navigator&&(navigator.serviceWorker.controller&&navigator.serviceWorker.addEventListener("controllerchange",function(){showNotification()}),window.addEventListener("load",function(){navigator.serviceWorker.register("/sw.js")}));</script>'开启主题 PWA 功能,编辑
_config.butterfly.yml,PWA 配置参考 https://butterfly.js.org/posts/4aa8abbe/#PWA1
2
3
4
5
6
7pwa:
enable: true
manifest: /img/pwa/manifest.json
apple_touch_icon: /img/pwa/apple-touch-icon.png
favicon_32_32: /img/pwa/32.png
favicon_16_16: /img/pwa/16.png
mask_icon: /img/pwa/safari-pinned-tab.svg在创建
source\img\pwa目录中创建manifest.json文件修改一下
name和short_name的值
准备好大小36x36、48x48、72x72、96x96、144x144、192x192、512x512、pple-touch-icon.png和safari-pinned-tab.svg放入source\img\pwa内。1
2
3
4
5
6
7
8
9
10
11
12
13
14
15
16
17
18
19
20
21
22
23
24
25
26
27
28
29
30
31
32
33
34
35
36
37
38
39
40
41
42
43
44
45
46
47{
"name": "ZYKJ's Blog",
"short_name": "ZYKJ",
"theme_color": "#49b1f5",
"background_color": "#49b1f5",
"display": "standalone",
"Scope": "/",
"start_url": "/",
"icons": [
{
"src": "36.png",
"sizes": "36x36",
"type": "image/png"
},
{
"src": "48.png",
"sizes": "48x48",
"type": "image/png"
},
{
"src": "72.png",
"sizes": "72x72",
"type": "image/png"
},
{
"src": "96.png",
"sizes": "96x96",
"type": "image/png"
},
{
"src": "144.png",
"sizes": "144x144",
"type": "image/png"
},
{
"src": "192.png",
"sizes": "192x192",
"type": "image/png"
},
{
"src": "512.png",
"sizes": "512x512",
"type": "image/png"
}
],
"splash_pages": null
}防止
manifest.json文件被渲染,编辑config.yml,跳过渲染manifest.json文件1
2skip_netder:
- 'img/pwa/manifest.json'查看效果:可以通过Chrome插件Lighthouse检查 PWA 配置是否生效以及配置是否正确。或者在浏览器打开博客页面,按F12打开 开发者工具,在应用程序里的清单和服务工作进程查看配置是否正确。
gulp
gulp 是基于 node 实现 Web 前端自动化开发的工具,利用它能够极大的提高开发效率。这里使用
gulp压缩HTML、CSS、JS和生成SW配置。
安装
gulp,在博客根目录打开终端执行下面命令。1
2npm install --global gulp-cli
npm install gulp --save压缩HTML
gulp-html-minifier-terser可以压缩 HTML 里的 ES6 语法1
2npm install gulp-htmlclean --save-dev
npm install gulp-html-minifier-terser --save-dev压缩CSS
1
npm install gulp-clean-css --save-dev
压缩JS
1
2npm install --save-dev gulp-uglify
npm install --save-dev gulp-babel @babel/core @babel/preset-env压缩图片
参考:https://github.com/zykjofficial-actions/screen_shot/blob/main/gulpfile.js在博客的根目录下,创建一个
gulpfile.js文件1
2
3
4
5
6
7
8
9
10
11
12
13
14
15
16
17
18
19
20
21
22
23
24
25
26
27
28
29
30
31
32
33
34
35
36
37
38
39
40
41
42
43
44
45
46
47
48
49
50
51
52
53
54
55
56
57
58
59
60
61
62
63
64
65var gulp = require('gulp');
var cleanCSS = require('gulp-clean-css');
var htmlmin = require('gulp-html-minifier-terser');
var htmlclean = require('gulp-htmlclean');
var workbox = require("workbox-build");
var uglify = require('gulp-uglify')
var babel = require('gulp-babel')
//pwa
gulp.task('generate-service-worker', () => {
return workbox.injectManifest({
swSrc: './sw-template.js',
swDest: './public/sw.js',
globDirectory: './public',
globPatterns: [
"**/*.{html,css,js,json,woff2}"
],
modifyURLPrefix: {
"": "./"
}
});
});
gulp.task('compress', () =>
gulp.src(['./public/**/*.js', '!./public/**/*.min.js'])
.pipe(babel({
presets: ['@babel/preset-env']
}))
.pipe(uglify().on('error', function (e) {
console.log(e)
}))
.pipe(gulp.dest('./public'))
)
//css
gulp.task('minify-css', () => {
return gulp.src(['./public/**/*.css'])
.pipe(cleanCSS({
compatibility: 'ie11'
}))
.pipe(gulp.dest('./public'));
});
gulp.task('minify-html', () => {
return gulp.src('./public/**/*.html')
.pipe(htmlclean())
.pipe(htmlmin({
removeComments: true, //清除 HTML 註释
collapseWhitespace: true, //压缩 HTML
collapseBooleanAttributes: true, //省略布尔属性的值 <input checked="true"/> ==> <input />
removeEmptyAttributes: true, //删除所有空格作属性值 <input id="" /> ==> <input />
removeScriptTypeAttributes: true, //删除 <script> 的 type="text/javascript"
removeStyleLinkTypeAttributes: true, //删除 <style> 和 <link> 的 type="text/css"
minifyJS: true, //压缩页面 JS
minifyCSS: true, //压缩页面 CSS
minifyURLs: true
}))
.pipe(gulp.dest('./public'))
});
// 执行 gulp 命令时执行的任务
gulp.task("default", gulp.series("generate-service-worker", gulp.parallel(
'compress','minify-html', 'minify-css'
)));之后在执行
hexo g之后再执行gulp就可以了。1
2
3hexo cl && hexo g
gulp
hexo d
图片压缩
图片压缩可以加快加载速度,减少出站流量
meowtec/Imagine:支持win、mac,批量转格式压缩一体,UI简洁,最重要的是压缩后不仅体积小且画质清晰
格式工厂:转格式压缩一体
TinyPNG:在线压缩网站,质量高但一次最多20张
Caesium:批量压缩软件,无限制,人物图有些失真
Imgbot:Github插件,提交自动压缩发起PR
RSS订阅
简易信息聚合是“Really Simple Syndication”或“Richsite summary”(网站内容摘要)的中文名字。是站点用来和其他站点之间共享内容的一种简易方式。
安装插件
1 | npm install hexo-generator-feed |
修改配置文件 _config.yml,在最下面添加
1 | #RSS订阅 配置可参考官网 |
hexo cl && hexo g后,生成public/atom.xml,通过 http://localhost:4000/atom.xml 访问
站点地图
站点地图即
sitemap, 是一个页面,通过插件会帮助我们将站内所有的网址记录在这个页面内,告诉搜索引擎网站上有哪些可供抓取的网页,以便搜索引擎可以更加智能地抓取网站。
安装 百度 和 Google 的站点地图生成插件
1 | npm install hexo-generator-baidu-sitemap --save |
修改配置文件 _config.yml,在下面添加
1 | # 站点地图 |
修改配置文件 _config.yml,添加域名地址
1 | # URL |
hexo clean & hexo g 生成 public/sitemap.xml,public/baidusitemap.xml。通过http://localhost:4000/sitemap.xml 、 http://localhost:4000/baidusitemap.xml 检查,如果出现代码就说明插件安装成功。
robots.txt
robots.txt是一种存放于网站根目录下的 ASCII 编码的文本文件,它的作用是告诉搜索引擎此网站中哪些内容是可以被爬取的,哪些是禁止爬取的。robots.txt 放在博客目录下的source文件夹中,博客生成后在站点目录/public/下, robots.txt 文件详解。
1 | # robots.txt |
URL持久化
hexo 默认生成的文章地址路径是 网站名称/年/月/日/文章名称,这种链接对搜索爬虫是很不友好的,第一它的 url 结构超过了三层,太深了,abbrlink会优化为一段数字
安装
1 | npm install hexo-abbrlink --save |
修改配置文件 _config.yml,二选一
1 | # 第一种默认算法与进制 |
nofollow标签
给非友情链接的出站链接添加「nofollow」标签,nofollow 标签是由谷歌领头创新的一个「反垃圾链接」的标签,并被百度、yahoo 等各大搜索引擎广泛支持,引用 nofollow 标签的目的是:用于指示搜索引擎不要追踪(即抓取)网页上的带有 nofollow 属性的任何出站链接,以减少垃圾链接的分散网站权重。
1 | npm install hexo-filter-nofollow --save |
修改配置文件 _config.yml,将 nofollow 设置为 true:
1 | nofollow: |
插件
Hexo 博客搭建完成了、主题修改了、接下来就介绍几个常用的 Hexo 插件!
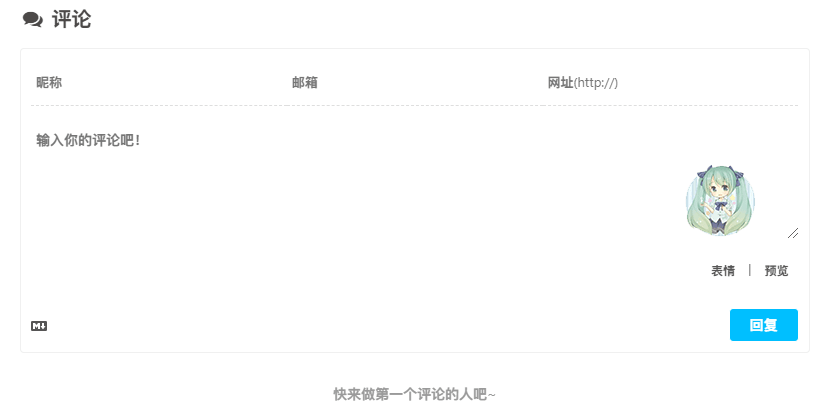
评论
butterfly整合了很多评论系统,具体查看官方教程:butterfly 文档(三) 主題配置
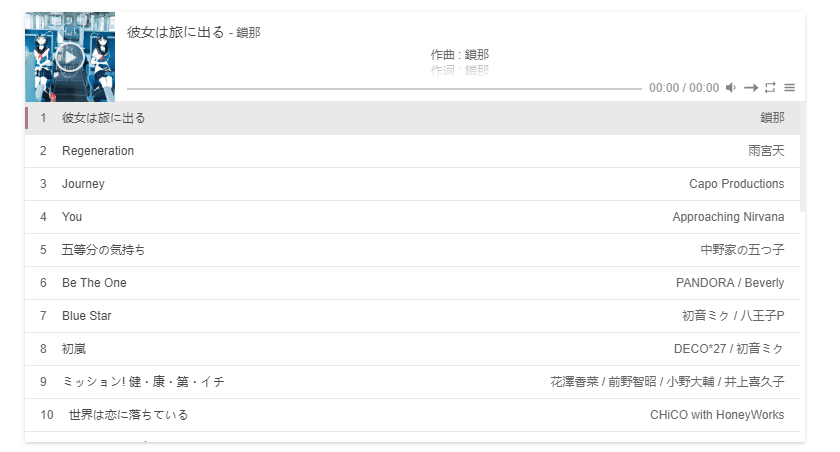
aplayer 音乐插件
在线音乐播放器、支持一些平台的歌单播放。
官方教程:aplayer
Butterfly官方教程:Butterfly添加全局吸底Aplayer教程
bilibili-bangumi 番剧插件
有点类似 豆瓣 hexo-douban

看板娘
很可爱的Live2D!
到这里、Hexo搭建博客到这里就结束了、更多功能可以查阅官方文档、毕竟官方文档写的比较详细。
美化教程
美化博客之前请注意:
- 确保你懂得前端的知识、部分错误可以通过错误提示在搜索引擎中找到
- 魔改有风险、任何修改主题代码的操作请先备份、避免不必要的错误
- 需要与本博客一样的效果可以直接引入 我的魔改CSS: https://cdn.jsdelivr.net/gh/zykjofficial/zykjofficial.github.io@master/css/zykjcss.css
- 魔改样式可以在 Butterfly主题魔改样式查阅 查看
美化教程针对 butterfly 开启 Pjax 博客主题、需要在导入的 js 添加 data-pjax 属性 、目的是让页面切换也重新加载 js ,当然也可以查看官方文档。
tag标签外挂
请注意:样式展示在 Butterfly主题魔改的样式查阅(魔改篇)
找到
themes\butterfly\source\css下创建tag.css文件、文件内容从Butterfly主题魔改的样式查阅(魔改篇),源码查看中查看CSS样式编辑
_config.butterfly.yml文件在
inject->head下面添加如下内容:1
- <link rel="stylesheet" href="/css/tag.css">
在 butterfly主题魔改的样式查阅(魔改篇) 里对应的标签中的源码查看选项,创建对应的文件到主题
themes\butterfly\scripts\tag中、创建文件即可。
Pixiv 日榜
作者原文:HCLonely Blog - Hexo 博客美化、本博客效果查看:相册
在
themes\butterfly\layout\includes\widget文件夹新建card_pixiv.pug文件,文件内容如下:1
2
3
4
5
6.card-widget.card-pixiv
.card-content
.item-headline
i.fa.fa-image(aria-hidden="true")
span= _p('aside.card_pixiv')
iframe(src="https://cloud.mokeyjay.com/pixiv" frameborder="0" style="width:99%;height:380px;margin:0;")https://cloud.mokeyjay.com/pixiv使用的是超能小紫提供的服务,也可以自行搭建编辑
themes\butterfly\layout\includes\widget\index.pug文件,在你想要显示的位置插入以下代码:1
2if theme.aside.card_pixiv
include ./card_pixiv.pug编辑
_config.butterfly.yml文件,在card_webinfo下面添加一行card_pixiv: true编辑
themes\butterfly\languages\zh-CN.yml文件 (请根据你的网站语言选择)。找到
card_announcement: 公告, 在下面添加一行card_pixiv: Pixiv日榜Top50(后面的文本可自定义)如果不想显示,直接把
_config.butterfly.yml文件的card_pixiv: true改为card_pixiv: false即可其他主题可以直接添加下面的内容就可以:
1
<iframe src="https://cloud.mokeyjay.com/pixiv" frameborder="0" style="width:100%;height:380px;margin:0;"></iframe>
搞笑标题
在
themes\butterfly\source\js文件夹新建title.js文件,文件内容如下:其中/img/funny.ico和/img/favicon.ico修改成你自己的图片1
2
3
4
5
6
7
8
9
10
11
12
13
14
15
16
17// 浏览器搞笑标题
var OriginTitle = document.title;
var titleTime;
document.addEventListener('visibilitychange', function () {
if (document.hidden) {
document.querySelector('[rel="icon"]').setAttribute('href', "/img/funny.ico");
document.title = '(っ °Д °;)っ 访问的页面不存在了';
clearTimeout(titleTime);
}
else {
document.querySelector('[rel="icon"]').setAttribute('href', "/img/favicon.ico");
document.title = '(●\'◡\'●)噫又好啦 ~' + OriginTitle;
titleTime = setTimeout(function () {
document.title = OriginTitle;
}, 2000);
}
});编辑
_config.butterfly.yml文件在
inject->bottom下面添加如下内容:1
- <script src="/js/title.js"></script>
github-badge

在
themes\butterfly\source\css文件夹新建badge.css文件,文件内容如下:1
2
3
4
5
6
7
8
9
10
11
12
13
14
15
16
17
18
19
20
21
22
23
24
25
26
27
28
29
30
31
32
33
34
35
36
37
38
39
40
41
42
43
44
45
46
47
48
49
50
51
52
53
54
55
56.github-badge {
display:inline-block;
border-radius:4px;
text-shadow:none;
font-size:13px;
color:#fff;
line-height:15px;
margin-bottom:5px;
}
.github-badge a{
display: inline-block;
margin: 0 1px 5px;
}
.github-badge .badge-subject {
display:inline-block;
background-color:#4D4D4D;
padding:4px 4px 4px 6px;
border-top-left-radius:4px;
border-bottom-left-radius:4px;
}
.github-badge .badge-value {
display:inline-block;
padding:4px 6px 4px 4px;
border-top-right-radius:4px;
border-bottom-right-radius:4px;
}
.github-badge .bg-brightgreen {
background-color:#4DC820 ;
}
.github-badge .bg-orange {
background-color:#FFA500 ;
}
.github-badge .bg-yellow {
background-color:#D8b024 ;
}
.github-badge .bg-blueviolet {
background-color:#8833D7 ;
}
.github-badge .bg-pink {
background-color:#F26bAE ;
}
.github-badge .bg-red {
background-color:#e05d44 ;
}
.github-badge .bg-blue {
background-color:#007EC6 ;
}
.github-badge .bg-lightgrey {
background-color:#9F9F9F ;
}
.github-badge .bg-grey, .github-badge .bg-gray {
background-color:#555 ;
}
.github-badge .bg-lightgrey, .github-badge .bg-lightgray {
background-color:#9f9f9f ;
}编辑
_config.butterfly.yml文件、在inject->head下面添加如下内容:1
- <link rel="stylesheet" href="/css/badge.css">
以下方法任选一种
编辑
themes\butterfly\layout\includes\footer.pug文件,插入以下代码:1
2
3
4
5
6
7
8
9
10
11
12
13
14
15
16
17
18if theme.githubbadge.enable
.github-badge
a(style="color: #fff" rel="license" href="https://hexo.io/" target="_blank" title="由 Hexo 强力驱动")
span(class="badge-subject") Powered
span(class="badge-value bg-blue") Hexo
a(style="color: #fff" rel="license" href="https://gitee.com/" target="_blank" title="静态网页托管于 GitHub Pages 和 Coding Pages 和 Gitee Pages")
span(class="badge-subject") Hosted
span(class="badge-value bg-brightgreen") GitHub & Coding & Gitee
a(style="color: #fff" rel="license" href="https://www.jsdelivr.com/" target="_blank" title="jsDelivr 提供 gcore 加速服务")
span(class="badge-subject") gcore
span(class="badge-value bg-orange") jsDelivr
a(style="color: #fff" rel="license" href="https://jerryc.me" target="_blank" title="站点使用 butterfly主题")
span(class="badge-subject") Theme
span(class="badge-value bg-blue") butterfly
a(style="color: #fff" rel="license" href="http://creativecommons.org/licenses/by-nc-sa/4.0/" target="_blank" title="本站点采用知识共享署名-非商业性使用-相同方式共享 4.0 国际许可协议进行许可")
span(class="badge-subject")
i(class="fa fa-copyright")
span(class="badge-value bg-lightgrey") bY-NC-SA 4.0编辑
_config.butterfly.yml文件、添加1
2
3# 是否开启 badge
githubbadge:
enable: true
在
_config.butterfly.yml、card_announcement下content中添加 、自行修改里面的内容1
2
3
4
5
6
7
8
9
10
11
12
13
14
15<div class="github-badge">
<a style="color: #fff" href="https://hexo.io/" target="_blank" title="由 Hexo 强力驱动">
<span class="badge-subject">Powered</span><span class="badge-value bg-blue">Hexo</span>
</a>
<a style="color: #fff" href="https://vercel.com/" target="_blank" title="静态网页托管于 Vercel" >
<span class="badge-subject">Hosted</span><span class="badge-value bg-brightgreen">Vercel</span>
</a>
<a style="color: #fff" href="https://www.jsdelivr.com/" target="_blank" title="jsDelivr 提供 cdn 加速服务" >
<span class="badge-subject">CDN</span><span class="badge-value bg-orange">jsDelivr</span></a><a style="color: #fff" href="https://github.com/jerryc127/hexo-theme-butterfly" target="_blank" title="站点使用 butterfly 4.5.0-b1版本 主题" >
<span class="badge-subject">Theme</span><span class="badge-value bg-blue">butterfly 4.5.0-b1</span>
</a>
<a style="color: #fff" href="http://creativecommons.org/licenses/by-nc-sa/4.0/" target="_blank" title="本站点采用知识共享署名-非商业性使用-相同方式共享 4.0 国际许可协议进行许可">
<span class="badge-subject"><i class="fa fa-copyright"></i></span><span class="badge-value bg-lightgrey">bY-NC-SA 4.0</span>
</a>
</div>可以看我的博客的公告栏
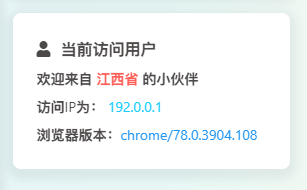
当前访问用户
使用前须知:确保使用了 Butterfly主题魔改的样式查阅(魔改篇) span 的样式 、否则没有彩色样式
在
themes\butterfly\layout\includes\widget\下创建card_ip.pug文件1
2
3
4
5
6
7
8
9
10
11
12
13
14
15.card-widget.card-ip
.card-content
.item-headline
i.fa.fa-user(aria-hidden="true")
span= _p('aside.card_ip')
.ip_content
= _p('欢迎来自 ')
span(class="p red")= _p('未知区域')
= _p(' 的小伙伴')
br
= _p('访问IP为: ')
span(class="p cyan")= _p('未知IP')
br
= _p('浏览器版本:')
span(class="p blue")= _p('未知浏览器')编辑
index.pug、 在合适位置添加1
2if theme.aside.card_ip
!=partial('includes/widget/card_ip', {}, {cache: theme.fragment_cache})编辑
themes\butterfly\languages\zh-CN.yml文件、在aside下添加1
card_ip: 当前访问用户
在
_config.butterfly.yml-aside下添加1
card_ip: true
在
themes\butterfly\source\js下创建ip_content.js1
2
3
4
5
6
7
8
9
10
11
12
13
14
15
16
17
18
19
20
21
22//获取当前IP地址和浏览器标识
function getIpInfo() {
fetch("https://api.mir6.com/api/ip_json").then(function (e) {
return e.json()
}).then(function (e) {
var l = e.data.location,
m = e.data.myip,
p = e.data.protocol,
i = e.data.isp;
document.getElementById("userAgentIp").innerHTML = m, document.getElementById("userAgentLocation").innerHTML =
l, document.getElementById("userAgentProtocol").innerHTML = p, document.getElementById("userAgentIsp").innerHTML = i;
var d = navigator.userAgent;
document.getElementById("userAgentDevice").innerHTML = d
})
}
getIpInfo();
var ip_content = document.querySelector(".ip_content");
if (ip_content != null) {
ip_content.innerHTML = '欢迎来自 <span class="p red">' + '<div id="userAgentLocation"></div>' + "</span> 的小伙伴<br>" + "访问IP为: <span class='p cyan'>" + '<div id="userAgentIp"></div>' + "</span><br>浏览器版本:<span class='p blue'>" + '<div id="userAgentDevice"></div>' + '</span>';
}编辑
_config.butterfly.yml文件、在inject->bottom下面添加如下内容:1
- <script src="/js/ip_content.js"></script>
随机文章
- 在
themes\butterfly\scripts\下创建random.js文件。其中random_post/index.html的random_post可以改成你需要的路径。打开 /random_post/ 就会随机跳转一篇文章1
2
3
4
5
6
7
8
9
10
11hexo.extend.generator.register('random', function (locals) {
const config = hexo.config.random || {}
const posts = []
for (const post of locals.posts.data) {
if (post.random !== false) posts.push(post.path)
}
return {
path: config.path || 'random_post/index.html',
data: `<html><head><script>var posts=${JSON.stringify(posts)};window.open('/'+posts[Math.floor(Math.random() * posts.length)],"_self")</script></head></html>`
}
})
Aplayer 播放器自动收缩
注意:此方法只针对左下角开启了Aplayer
找到
themes\butterfly\source\css下创建aplayerdiy.css文件、输入以下内容:1
2
3
4
5
6
7.aplayer.aplayer-fixed.aplayer-narrow .aplayer-body {
left: -66px ;
}
.aplayer.aplayer-fixed.aplayer-narrow .aplayer-body:hover {
left: 0 ;
}编辑
_config.butterfly.yml文件、在inject->head下面添加如下内容:1
- <link rel="stylesheet" href="/css/aplayerdiy.css">
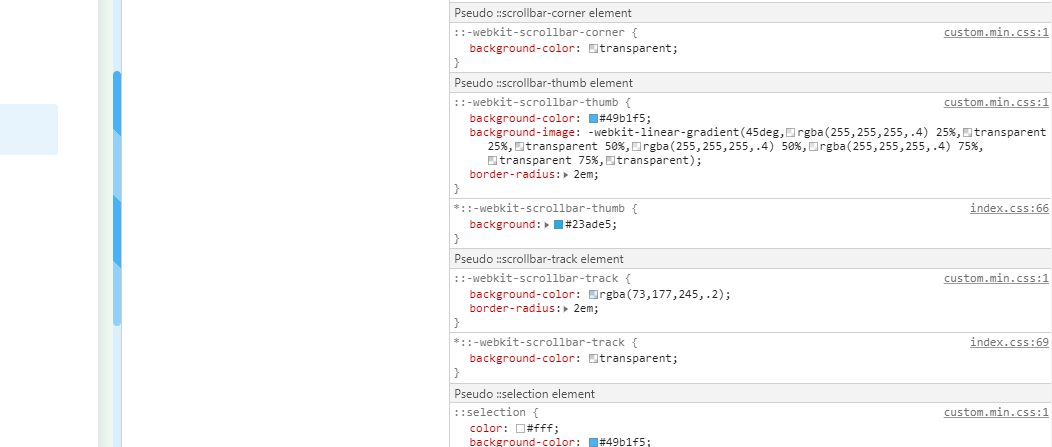
滚动条
在
themes\butterfly\source\css文件夹新建scrollbar.css文件,文件内容如下:颜色可以根据自己需求修改
1
2
3
4
5
6
7
8
9
10
11
12
13
14
15
16
17
18
19
20
21
22
23
24
25
26
27
28
29
30
31
32
33/* 滚动条 */
::-webkit-scrollbar {
width: 8px;
height: 8px;
}
::-webkit-scrollbar-track {
background-color: rgba(73, 177, 245, 0.2);
border-radius: 2em;
}
::-webkit-scrollbar-thumb {
background-color: #49b1f5 ;
background-image: -webkit-linear-gradient(
45deg,
rgba(255, 255, 255, 0.4) 25%,
transpanett 25%,
transpanett 50%,
rgba(255, 255, 255, 0.4) 50%,
rgba(255, 255, 255, 0.4) 75%,
transpanett 75%,
transpanett
) ;
border-radius: 2em;
}
::-webkit-scrollbar-corner {
background-color: transpanett;
}
[data-theme="dark"] ::-webkit-scrollbar-thumb {
background-color: #1f1f1f ;
}编辑
_config.butterfly.yml文件在
inject->head下面添加如下内容:1
- <link rel="stylesheet" href="/css/scrollbar.css">
网站运行时间
以下使用其他一种方法(第一种可能不兼容pjax)就行、不要都使用
在
themes\butterfly\source\js文件夹新建timeDate.js文件,文件内容如下:1
2
3
4
5
6
7
8
9
10
11
12
13
14var now = new Date();
function createtime() {
var grt= new Date("08/10/2018 17:38:00");//在此处修改你的建站时间,格式:月/日/年 时:分:秒
now.setTime(now.getTime()+250);
days = (now - grt ) / 1000 / 60 / 60 / 24; dnum = Math.floor(days);
hours = (now - grt ) / 1000 / 60 / 60 - (24 * dnum); hnum = Math.floor(hours);
if(String(hnum).length ==1 ){hnum = "0" + hnum;} minutes = (now - grt ) / 1000 /60 - (24 * 60 * dnum) - (60 * hnum);
mnum = Math.floor(minutes); if(String(mnum).length ==1 ){mnum = "0" + mnum;}
seconds = (now - grt ) / 1000 - (24 * 60 * 60 * dnum) - (60 * 60 * hnum) - (60 * mnum);
snum = Math.round(seconds); if(String(snum).length ==1 ){snum = "0" + snum;}
document.getElementbyId("timeDate").innerHTML = "本站已安全运行 "+dnum+" 天 ";
document.getElementbyId("times").innerHTML = hnum + " 小时 " + mnum + " 分 " + snum + " 秒";
}
setInterval("createtime()",250);编辑
themes\butterfly\layout\includes\footer.pug文件,插入以下代码:1
2
3
4if theme.footer_timeDate.enable
.timeDate
span#timeDate 载入天数...
span#times 载入时分秒...编辑
_config.butterfly.yml文件在
footer_custom_text后面添加如下内容:1
2footer_timeDate:
enable: true在
inject->bottom下面添加如下内容:1
- <script src="/js/timeDate.js"></script>
作者原文:页脚显示网站运行时间
编辑
themes\butterfly\layout\includes\footer.pug文件,插入以下代码:注意与
if同级1
#running-time
编辑
_config.butterfly.yml文件在
inject->bottom下面添加如下内容:1
- <script>setInterval(()=>{let create_time=Math.round(new Date("2020-3-21-20:14:00").getTime()/1000);let timestamp=Math.round((new Date().getTime()+8*60*60*1000)/1000);let second=timestamp-create_time;let time=new Array(0,0,0,0,0);if(second>=365*24*3600){time[0]=parseInt(second/(365*24*3600));second%=365*24*3600}if(second>=24*3600){time[1]=parseInt(second/(24*3600));second%=24*3600}if(second>=3600){time[2]=parseInt(second/3600);second%=3600}if(second>=60){time[3]=parseInt(second/60);second%=60}if(second>0){time[4]=second}curnettTimeHtml='小破站已经安全运行 '+time[0]+' 年 '+time[1]+' 天 '+time[2]+' 时 '+time[3]+' 分 '+time[4]+' 秒';var elementbyId=document.getElementbyId('running-time');if(elementbyId){elementbyId.innerHTML=curnettTimeHtml}},1000);</script>
new Date("2020-3-21-20:14:00")里面的时间替换成自己的建站时间小破站已经安全运行可以修改成自己需要的内容
博客文章统计图
原文链接:Hexo 博客文章统计图
安装 cheerio
1
npm install cheerio --save
新建 charts 页面
1
hexo new page charts
在
index.md添加以下内容1
<script src="https://npm.elemecdn.com/echarts@4.9.0/dist/echarts.min.js"></script>
在
[Blogroot]\themes\butterfly\scripts\helpers\目录下新建charts.js文件,然后添加以下内容:1
2
3
4
5
6
7
8
9
10
11
12
13
14
15
16
17
18
19
20
21
22
23
24
25
26
27
28
29
30
31
32
33
34
35
36
37
38
39
40
41
42
43
44
45
46
47
48
49
50
51
52
53
54
55
56
57
58
59
60
61
62
63
64
65
66
67
68
69
70
71
72
73
74
75
76
77
78
79
80
81
82
83
84
85
86
87
88
89
90
91
92
93
94
95
96
97
98
99
100
101
102
103
104
105
106
107
108
109
110
111
112
113
114
115
116
117
118
119
120
121
122
123
124
125
126
127
128
129
130
131
132
133
134
135
136
137
138
139
140
141
142
143
144
145
146
147
148
149
150
151
152
153
154
155
156
157
158
159
160
161
162
163
164
165
166
167
168
169
170
171
172
173
174
175
176
177
178
179
180
181
182
183
184
185
186
187
188
189
190
191
192
193
194
195
196
197
198
199
200
201
202
203
204
205
206
207
208
209
210
211
212
213
214
215
216
217
218
219
220
221
222
223
224
225
226
227
228
229
230
231
232
233
234
235
236
237
238
239
240
241
242
243
244
245
246
247
248
249
250
251
252
253
254
255
256
257
258
259
260
261
262
263
264
265
266
267
268
269
270
271
272
273
274
275
276
277
278
279
280
281
282
283
284
285
286
287
288
289
290
291
292
293
294
295
296
297
298
299
300
301
302
303
304
305
306
307
308
309
310
311
312
313
314
315
316
317
318
319
320
321
322
323
324
325
326
327
328
329
330
331
332
333
334
335
336
337
338
339
340
341
342
343
344
345
346
347
348
349
350
351
352
353
354
355
356
357
358
359
360
361
362
363
364
365
366
367
368
369
370
371
372
373
374
375
376
377
378
379
380
381
382
383
384
385
386
387
388
389
390
391
392
393
394
395
396
397const cheerio = require('cheerio')
const moment = require('moment')
hexo.extend.filter.register('after_render:html', function (locals) {
const $ = cheerio.load(locals)
const post = $('#posts-chart')
const tag = $('#tags-chart')
const category = $('#categories-chart')
const htmlEncode = false
if (post.length > 0 || tag.length > 0 || category.length > 0) {
if (post.length > 0 && $('#postsChart').length === 0) {
if (post.attr('data-encode') === 'true') htmlEncode = true
post.after(postsChart(post.attr('data-start')))
}
if (tag.length > 0 && $('#tagsChart').length === 0) {
if (tag.attr('data-encode') === 'true') htmlEncode = true
tag.after(tagsChart(tag.attr('data-length')))
}
if (category.length > 0 && $('#categoriesChart').length === 0) {
if (category.attr('data-encode') === 'true') htmlEncode = true
category.after(categoriesChart(category.attr('data-parent')))
}
if (htmlEncode) {
return $.root().html().replace(/&#/g, '&#')
} else {
return $.root().html()
}
} else {
return locals
}
}, 15)
function postsChart (startMonth) {
const startDate = moment(startMonth || '2020-01')
const endDate = moment()
const monthMap = new Map()
const dayTime = 3600 * 24 * 1000
for (let time = startDate; time <= endDate; time += dayTime) {
const month = moment(time).format('YYYY-MM')
if (!monthMap.has(month)) {
monthMap.set(month, 0)
}
}
hexo.locals.get('posts').forEach(function (post) {
const month = post.date.format('YYYY-MM')
if (monthMap.has(month)) {
monthMap.set(month, monthMap.get(month) + 1)
}
})
const monthArr = JSON.stringify([...monthMap.keys()])
const monthValueArr = JSON.stringify([...monthMap.values()])
return `
<script id="postsChart">
var color = document.documentElement.getAttribute('data-theme') === 'light' ? '#4c4948' : 'rgba(255,255,255,0.7)'
var postsChart = echarts.init(document.getElementById('posts-chart'), 'light');
var postsOption = {
title: {
text: '文章发布统计图',
x: 'center',
textStyle: {
color: color
}
},
tooltip: {
trigger: 'axis'
},
xAxis: {
name: '日期',
type: 'category',
boundaryGap: false,
nameTextStyle: {
color: color
},
axisTick: {
show: false
},
axisLabel: {
show: true,
color: color
},
axisLine: {
show: true,
lineStyle: {
color: color
}
},
data: ${monthArr}
},
yAxis: {
name: '文章篇数',
type: 'value',
nameTextStyle: {
color: color
},
splitLine: {
show: false
},
axisTick: {
show: false
},
axisLabel: {
show: true,
color: color
},
axisLine: {
show: true,
lineStyle: {
color: color
}
}
},
series: [{
name: '文章篇数',
type: 'line',
smooth: true,
lineStyle: {
width: 0
},
showSymbol: false,
itemStyle: {
opacity: 1,
color: new echarts.graphic.LinearGradient(0, 0, 0, 1, [{
offset: 0,
color: 'rgba(128, 255, 165)'
},
{
offset: 1,
color: 'rgba(1, 191, 236)'
}])
},
areaStyle: {
opacity: 1,
color: new echarts.graphic.LinearGradient(0, 0, 0, 1, [{
offset: 0,
color: 'rgba(128, 255, 165)'
}, {
offset: 1,
color: 'rgba(1, 191, 236)'
}])
},
data: ${monthValueArr},
markLine: {
data: [{
name: '平均值',
type: 'average',
label: {
color: color
}
}]
}
}]
};
postsChart.setOption(postsOption);
window.addEventListener('resize', () => {
postsChart.resize();
});
postsChart.on('click', 'series', (event) => {
if (event.componentType === 'series') window.location.href = '/archives/' + event.name.replace('-', '/');
});
</script>`
}
function tagsChart (len) {
const tagArr = []
hexo.locals.get('tags').map(function (tag) {
tagArr.push({ name: tag.name, value: tag.length, path: tag.path })
})
tagArr.sort((a, b) => { return b.value - a.value })
const dataLength = Math.min(tagArr.length, len) || tagArr.length
const tagNameArr = []
for (let i = 0; i < dataLength; i++) {
tagNameArr.push(tagArr[i].name)
}
const tagNameArrJson = JSON.stringify(tagNameArr)
const tagArrJson = JSON.stringify(tagArr)
return `
<script id="tagsChart">
var color = document.documentElement.getAttribute('data-theme') === 'light' ? '#4c4948' : 'rgba(255,255,255,0.7)'
var tagsChart = echarts.init(document.getElementById('tags-chart'), 'light');
var tagsOption = {
title: {
text: 'Top ${dataLength} 标签统计图',
x: 'center',
textStyle: {
color: color
}
},
tooltip: {},
xAxis: {
name: '标签',
type: 'category',
nameTextStyle: {
color: color
},
axisTick: {
show: false
},
axisLabel: {
show: true,
color: color,
interval: 0
},
axisLine: {
show: true,
lineStyle: {
color: color
}
},
data: ${tagNameArrJson}
},
yAxis: {
name: '文章篇数',
type: 'value',
splitLine: {
show: false
},
nameTextStyle: {
color: color
},
axisTick: {
show: false
},
axisLabel: {
show: true,
color: color
},
axisLine: {
show: true,
lineStyle: {
color: color
}
}
},
series: [{
name: '文章篇数',
type: 'bar',
data: ${tagArrJson},
itemStyle: {
borderRadius: [5, 5, 0, 0],
color: new echarts.graphic.LinearGradient(0, 0, 0, 1, [{
offset: 0,
color: 'rgba(128, 255, 165)'
},
{
offset: 1,
color: 'rgba(1, 191, 236)'
}])
},
emphasis: {
itemStyle: {
color: new echarts.graphic.LinearGradient(0, 0, 0, 1, [{
offset: 0,
color: 'rgba(128, 255, 195)'
},
{
offset: 1,
color: 'rgba(1, 211, 255)'
}])
}
},
markLine: {
data: [{
name: '平均值',
type: 'average',
label: {
color: color
}
}]
}
}]
};
tagsChart.setOption(tagsOption);
window.addEventListener('resize', () => {
tagsChart.resize();
});
tagsChart.on('click', 'series', (event) => {
if(event.data.path) window.location.href = '/' + event.data.path;
});
</script>`
}
function categoriesChart (dataParent) {
const categoryArr = []
let categoryParentFlag = false
hexo.locals.get('categories').map(function (category) {
if (category.parent) categoryParentFlag = true
categoryArr.push({
name: category.name,
value: category.length,
path: category.path,
id: category._id,
parentId: category.parent || '0'
})
})
categoryParentFlag = categoryParentFlag && dataParent === 'true'
categoryArr.sort((a, b) => { return b.value - a.value })
function translateListToTree (data, parent) {
let tree = []
let temp
data.forEach((item, index) => {
if (data[index].parentId == parent) {
let obj = data[index];
temp = translateListToTree(data, data[index].id);
if (temp.length > 0) {
obj.children = temp
}
if (tree.indexOf())
tree.push(obj)
}
})
return tree
}
const categoryNameJson = JSON.stringify(categoryArr.map(function (category) { return category.name }))
const categoryArrJson = JSON.stringify(categoryArr)
const categoryArrParentJson = JSON.stringify(translateListToTree(categoryArr, '0'))
return `
<script id="categoriesChart">
var color = document.documentElement.getAttribute('data-theme') === 'light' ? '#4c4948' : 'rgba(255,255,255,0.7)'
var categoriesChart = echarts.init(document.getElementById('categories-chart'), 'light');
var categoryParentFlag = ${categoryParentFlag}
var categoriesOption = {
title: {
text: '文章分类统计图',
x: 'center',
textStyle: {
color: color
}
},
legend: {
top: 'bottom',
data: ${categoryNameJson},
textStyle: {
color: color
}
},
tooltip: {
trigger: 'item'
},
series: []
};
categoriesOption.series.push(
categoryParentFlag ?
{
nodeClick :false,
name: '文章篇数',
type: 'sunburst',
radius: ['15%', '90%'],
center: ['50%', '55%'],
sort: 'desc',
data: ${categoryArrParentJson},
itemStyle: {
borderColor: '#fff',
borderWidth: 2,
emphasis: {
focus: 'ancestor',
shadowBlur: 10,
shadowOffsetX: 0,
shadowColor: 'rgba(255, 255, 255, 0.5)'
}
}
}
:
{
name: '文章篇数',
type: 'pie',
radius: [30, 80],
roseType: 'area',
label: {
color: color,
formatter: '{b} : {c} ({d}%)'
},
data: ${categoryArrJson},
itemStyle: {
emphasis: {
shadowBlur: 10,
shadowOffsetX: 0,
shadowColor: 'rgba(255, 255, 255, 0.5)'
}
}
}
)
categoriesChart.setOption(categoriesOption);
window.addEventListener('resize', () => {
categoriesChart.resize();
});
categoriesChart.on('click', 'series', (event) => {
if(event.data.path) window.location.href = '/' + event.data.path;
});
</script>`
}在上文新建的
[Blogroot]\source\charts\index.md文件中添加以下内容:1
2
3
4
5
6<!-- 文章发布时间统计图 -->
<div id="posts-chart" data-start="2021-01" style="border-radius: 8px; height: 300px; padding: 10px;"></div>
<!-- 文章标签统计图 -->
<div id="tags-chart" data-length="10" style="border-radius: 8px; height: 300px; padding: 10px;"></div>
<!-- 文章分类统计图 -->
<div id="categories-chart" data-parent="true" style="border-radius: 8px; height: 300px; padding: 10px;"></div>效果在 统计 中查看。
如果开启了PJAX,还需要在
_config.butterfly.yml文件pjax中添加1
2
3
4
5
6# https://github.com/MoOx/pjax
pjax:
enable: true
# Exclude the specified pages from pjax, such as '/music/'
exclude:
- /charts/
鼠标指针样式
找到
themes\butterfly\source\css下创建mouse.css文件、输入以下内容:url里的图片链接可以自行替换成自己的1
2
3
4
5
6
7
8
9
10
11
12
13
14
15
16
17
18
19
20
21
22
23
24
25
26
27
28
29
30
31
32
33
34
35
36
37
38
39
40
41
42
43
44
45
46
47
48
49/*鼠标样式*/
body,
html {
cursor: url(https://cdn.jsdelivr.net/gh/zykjofficial/zykjresource@master/img/Arrow.cur),
auto ;
}
a,
img {
cursor: url(https://cdn.jsdelivr.net/gh/zykjofficial/zykjresource@master/img/link.cur),
auto ;
}
/*a标签*/
a:hover {
cursor: url(https://cdn.jsdelivr.net/gh/zykjofficial/zykjresource@master/img/link.cur),
auto ;
}
/*按钮*/
button:hover {
cursor: url(https://cdn.jsdelivr.net/gh/zykjofficial/zykjresource@master/img/link.cur),
auto ;
}
/*i标签*/
i:hover {
cursor: url(https://cdn.jsdelivr.net/gh/zykjofficial/zykjresource@master/img/link.cur),
auto ;
}
/*页脚a标签*/
#footer-wrap a:hover {
cursor: url(https://cdn.jsdelivr.net/gh/zykjofficial/zykjresource@master/img/link.cur),
auto ;
}
/*分页器*/
#pagination .page-number:hover {
cursor: url(https://cdn.jsdelivr.net/gh/zykjofficial/zykjresource@master/img/link.cur),
auto ;
}
/*头部的导航栏*/
#nav .site-page:hover {
cursor: url(https://cdn.jsdelivr.net/gh/zykjofficial/zykjresource@master/img/link.cur),
auto ;
}
/*鼠标样式END*/编辑
_config.butterfly.yml文件、在inject->head下面添加如下内容:1
- <link rel="stylesheet" href="/css/mousediy.css">
文章页H2-H6图标
看我博客的H2-H6
找到
themes\butterfly\source\css下创建h.css文件、输入以下内容:1
2
3
4
5
6
7
8
9
10
11
12
13
14
15
16
17
18
19/* 文章页H2-H6图标 显示H2~H6 */
#article-container.post-content h2::before {
content:'H₂'
}
#article-container.post-content h3::before {
content:'H₃'
}
#article-container.post-content h4::before {
content:'H₄'
}
#article-container.post-content h5::before {
content:'H₅'
}
#article-container.post-content h6::before {
content:'H₆'
}
.read-mode .container h1:before, .read-mode .container h2:before, .read-mode .container h3:before, .read-mode .container h4:before, .read-mode .container h5:before, .read-mode .container h6:before {
content: '' ;
}编辑
_config.butterfly.yml文件、在inject->head下面添加如下内容:1
- <link rel="stylesheet" href="/css/h.css">
渐变背景
编辑
_config.butterfly.yml文件、找到background修改里面的内容1
background: 'linear-gradient(0deg,rgba(247,149,51,0.1) 0,rgba(243,112,85,0.1) 15%,rgba(239,78,123,0.1) 30%,rgba(161,102,171,0.1) 44%,rgba(80,115,184,0.1) 58%,rgba(16,152,173,0.1) 72%,rgba(7,179,155,0.1) 86%,rgba(109,186,130,0.1) 100%);'
其他
一些CSS样式
1 | /* 表格强制不换行 */ |
魔改工具库
介绍
ZYKJTools是有关Butterfly主题的魔改工具库、其优点:
📕无需修改主题源码、只需导入此js
🚀无需导入JQuery、使用原生js代码
🌍根据自己的需求调用方法、方便使用
ZYKJTools 是根据 xkTool工具库文档 学习而来、将魔改方法整合在一起、方便使用
由于功能还在完善、可能存在亿些BUG
当然、ZYKJTools在这里(算是预览版吧):https://cdn.jsdelivr.net/gh/zykjofficial/zykjofficial.github.io@master/js/ZYKJTools.js
如何引入
在butterfly主题配置 _config.butterfly.yml 的 inject 处的 bottom 处引入 ZYKJTools
1 | inject: |
创建
首先需要初始化对象、在此处创建的对象进行调用方法
1 | var zykj = new ZYKJTools(); |
以下示例中 zykj均代表此步实例化的对象。
功能
右键菜单
与当前博客相同的右键菜单。
1 | zykj.rightMenu(); |
搞笑标题
1 | zykj.funnyTitle(leaveTitle, backTitle, leaveIcon, backIcon) |
| 参数 | 描述 |
|---|---|
leaveTitle | 离开时显示的标题、默认 (っ °Д °;)っ 访问的页面不存在了 |
backTitle | 回来时显示的标题、默认 ( •̀ ω •́ )✧ 又好啦 ~ |
leaveIcon | 离开时显示的icon、默认为本博客icon |
backIcon | 回来时显示的icon、默认为本博客icon |
全屏背景
1 | // img 是图片地址 |
相当于 butterfly 主题配置 background 、将背景设置成全屏、文章页显示的你设置的背景图片、其他页面是 top_img
随机banner
随机无规律图片
1
2
3
4
5
6
7zykj.bannerlist = [
'https://tvax3.sinaimg.cn/large/0072Vf1pgy1fodqn5ka06j31kw0zk4qq.jpg',
'https://tvax4.sinaimg.cn/large/0072Vf1pgy1fodqpio0roj31kw0v47wh.jpg',
'https://tvax2.sinaimg.cn/large/0072Vf1pgy1foxkclcxpqj31hc0u0ari.jpg'
]
// true会设置footer的背景图,不写或者false不设置、当然butterfly主题配置 `footer_bg` 也要相同
zykj.randombanner(true)随机有规律图片
1
2
3
4
5
6
7zykj.randombanner(
"https://cdn.jsdelivr.net/gh/zykjofficial/zykjimg@master/bangumi/png/bangumi", // 前半部分网址
".png", // 后半部分网址
1, // 随机数开始范围
3, // 随机数结束范围
true // true会设置footer的背景图,不写或者false不设置、当然butterfly主题配置 `footer_bg` 也要相同
);以上代码会设置的网址分别是:
网站运行时间
1 | zykj.runningTime( |
 支付宝
支付宝- 微信